Live Streaming through YouTube and Facebook
Live Streaming today is a big deal. A lot of churches are doing it, and I recommend that you do it too. Many ask if it’s productive to have a live stream. I believe it is. Here is a great article from Carey Nieuwhof talking about how our “Netflix Culture” impacts church engagement: Carey Nieuwhof’s Article. By the way, I also recommend that you follow Carey and listen to his weekly podcasts if you are truly wanting to move forward and grow as a church!
There are multiple ways to live stream online today, but we’re going to focus on the two most common options.
YouTube Live
YouTube Live has been around for several years now. It’s a great option for easily live streaming and archiving your services. There aren’t a lot of disadvantages to it other than the fact that you need to have 100 subscribers to your channel before you can name it, and that they are now forcing you to set up several linked accounts in order to embed your live streams into your website.
Facebook Live
Facebook has recently opened up to live streaming, and in my opinion, it has the most potential for churches. There are several features that make it a great choice for your church. One, we already have a community built out on Facebook! If people are following you, they will see your live streams. Two, Facebook actually sends followers a notification when someone goes live. That is a huge bonus.
Live Streaming: Equipment
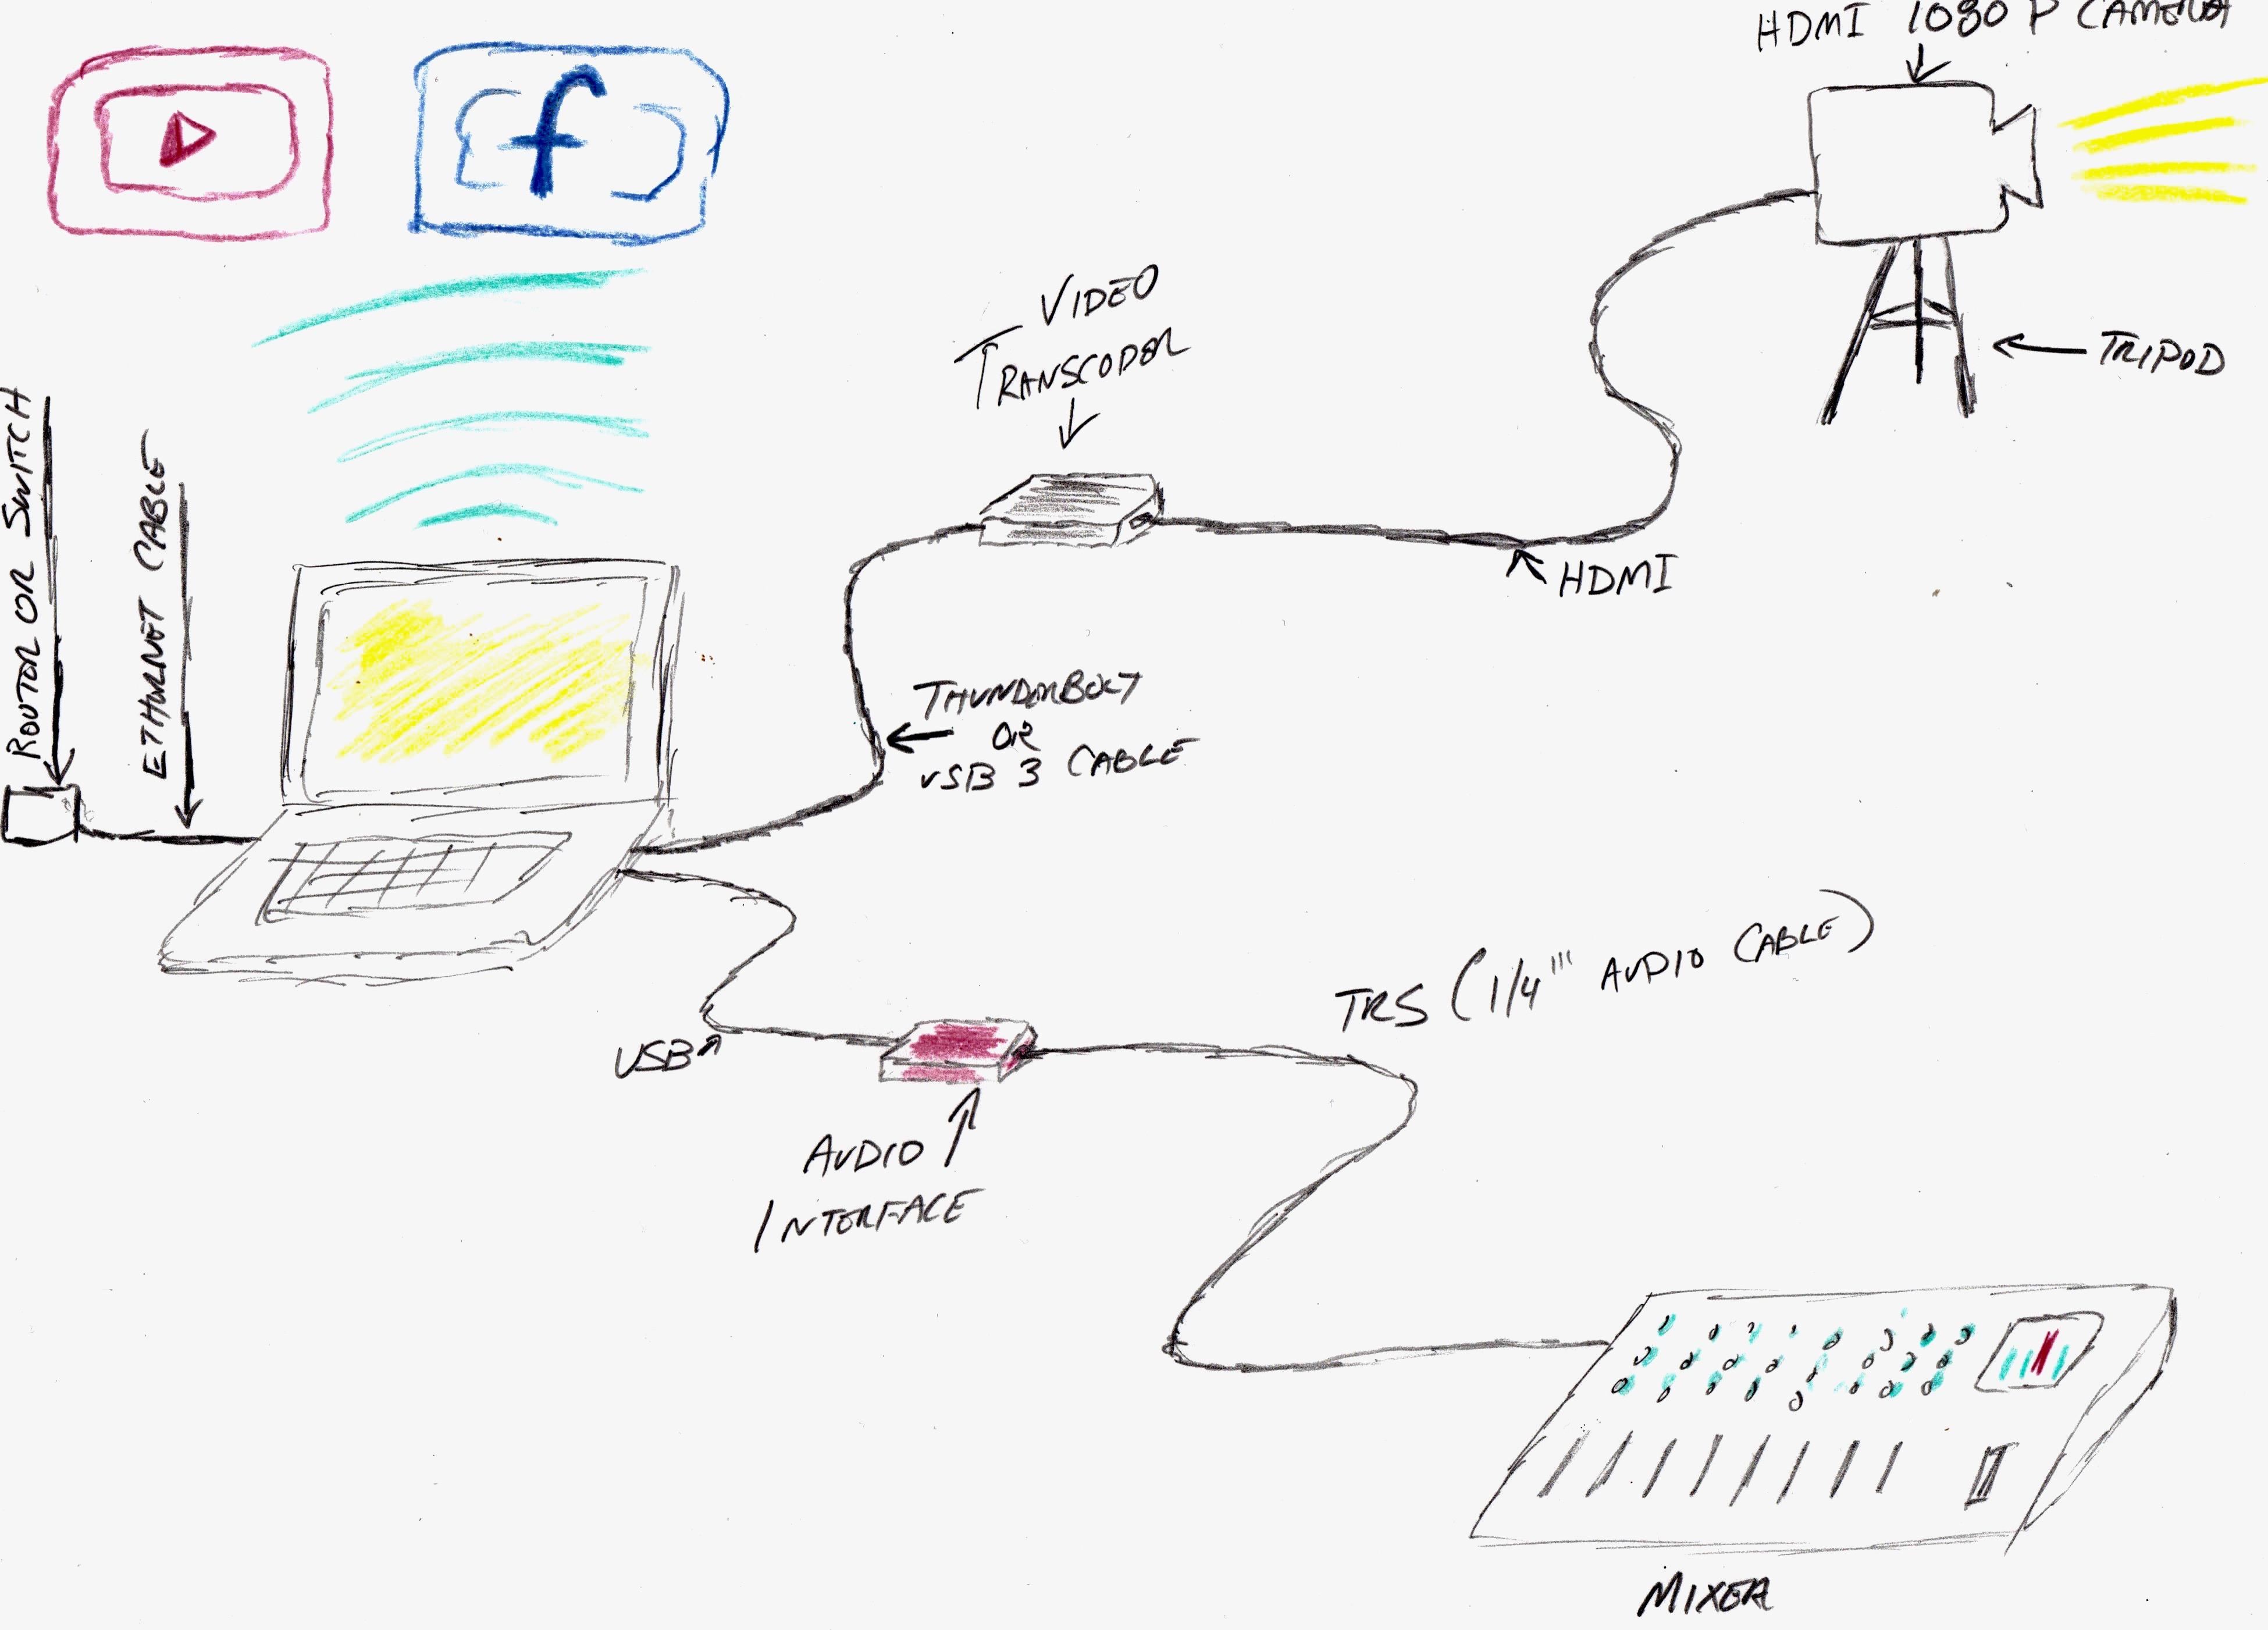
For a clear understanding of what you will need in order to live stream, take a look at this (not so good) drawing that I made. This is based on a 1-camera setup.

To stream your video you’ll need several pieces of equipment:
Camera
You will need a fairly high-quality camera. Thankfully, you can get a high-quality, HDMI camera at only a fraction of the cost of just a few years ago. Today, you can get a decent camcorder for a couple hundred dollars. Here are some important features:
Live HDMI Video Out: This is necessary to connect your camera directly to a transcoder that will convert your video into something the computer can use and upload to YouTube or Facebook.
Optical Zoom: Optical zoom moves the lenses to zoom in and gives a much better picture from afar. Digital zoom is not recommended.
Transcoder
The transcoder accepts a digital video input and outputs a stream that your computer can handle. Recommended options:
- Blackmagic UltraStudio Recorder (requires Thunderbolt connection)
- Elgato Game Capture HD60 or HD60-S (USB options)
Note: For multi-camera setups, you will need a switcher like the Blackmagic ATEM Television Studio.
Audio Adapter/Interface
To get audio from your soundboard into the computer, use:
Computer
A decent computer is required to process HD video in real-time. I recommend a Mac for reliability and longevity. Ensure your computer can handle the resolution and frame rates you intend to stream.
Internet Connection
Ensure you have at least 5Mbps upload speed. Use Speedtest to check. Avoid Wi-Fi—use a wired Ethernet connection to reduce lag and ensure stability.
Live Streaming: Software
I recommend OBS - Open Broadcaster Studio. It’s free, open source, and highly capable.
OBS Software Setup
- Download and Install OBS Software
- Video Configuration:
- 1080p: Resolution: 1920x1080, Bitrate: 3000-6000 Kbps
- 720p: Resolution: 1280x720, Bitrate: 1500-4000 Kbps
- Configure Scenes: Add camera, audio, and graphics sources.
Embedding in Your Website
You can embed live streams into your website for easy access. Create a “Live” page and embed the stream link from YouTube or Facebook.
YouTube Note: Enable and connect an AdSense account to embed YouTube live streams. Learn more.
Showing the Live Stream in Other Areas at the Church
You can use devices like Apple TV, Chromecast, or smart TVs to show your live stream in other rooms.
